Ah, it’s been awhile since I’ve done one of my longer blog posts. There’s one I’ve been itching to do for the last few weeks around SQL Server Integration Services. If you follow this blog, you know I have a great affinity for SSIS. A question came up a few weeks back around how could someone enable SSIS as a data source in Reporting Services, since the currently “documented” way is not only several years old, it is completely unsupported by Microsoft.
Well, a colleague of mine pointed out there was a way to do this using the Data Streaming Destination option in an SSIS package. This option allows you to query the output like you would any other SQL Server view in Reporting Services. Needless to say, I was eager to put together a walkthrough for folks so they could try this themselves.
To create a SQL Server Integration Services Project, you’ll need to make sure you have a program called SQL Server Data Tools installed. It integrates with Visual Studio, but you don’t need Visual Studio already installed to use this program. If you do have Visual Studio installed, however, this will add new project types you can select. The version for SQL Server 2016 is located here to download and use – https://msdn.microsoft.com/en-us/library/mt204009.aspx.
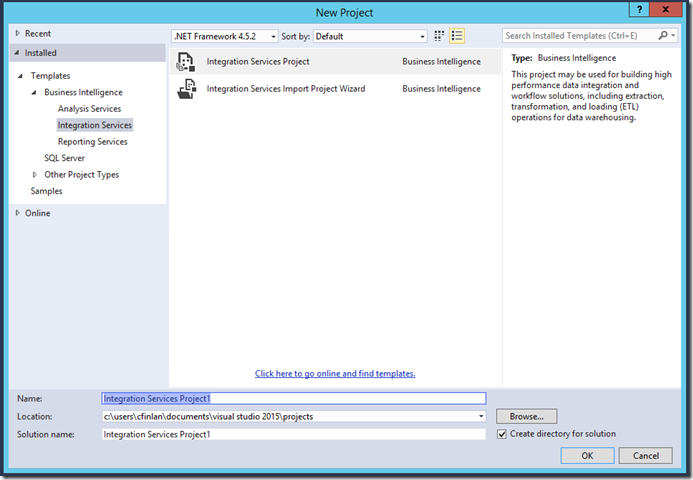
To get started, select File – > New -> Project, then select the Integration Services Project option.
I’m going to create a very simple project that exposes an oData data source, which isn’t available in Reporting Services natively (yet . .). I’m using the good ol’ Northwind oData feed, but you could also use an oData feed you expose from a LightSwitch project, for example.
To do this, I’ll add a Data Flow Task to my SSIS project.
 Double click on the task to open the Data Flow Task tab. Here is where you will add your source and destination locations. First, I am going to use an oData source, which I’ll find under the “Common” items in my toolbox. I can then drag that onto my Data Flow Task.
Double-click on the source to create a new connection to my oData source. Click New and enter the information for the Northwind data feed –
Once that’s done, click OK and select the data collection to expose. Since this is just an example, we’ll leave the Columns or Error Output tabs as is and hit OK to save this.
Now we can add the Data Streaming Destination item from the toolbox to the Data Flow Task

and connect it using the arrow so it looks like so.

While we could change the columns we pass through or change the column names, we’ll leave everything as is for this example and simply publish the package by choosing “Deploy” under the Project menu.
The wizard is pretty self-explanatory, but one thing to keep in mind is you need to have an SSIS Catalog already setup on your SQL Server instance. Assuming you have that done, walk through the steps and deploy to your catalog in SQL Server.
Open up SQL Server Management Studio and login to the SQL Server Instance you deployed your project to. You should see it under your “Integration Services Catalogs” folder.

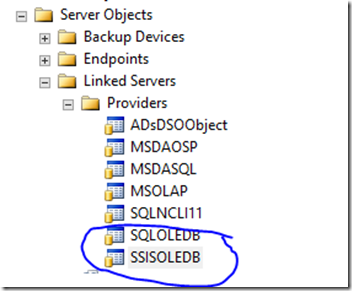
Now you’ll need to enable the “Allow inprocess” option on the SSISOLEDB linked server provider that’s setup in SQL Server. Browse to the Providers folder under the Server Objects –> Linked Servers folder path

Right-Click on the provider and select Properties. Simply check the “Allow inprocess” option and click OK to save.
Head the Start Menu on your server and open the SQL Server 2016 Data Feed Publishing Wizard. Here’s where you’ll enter the settings to select your SSIS package and the SQL database you want to publish it to. You can name the SQL view whatever you’d like. Hit Publish to execute the wizard and create the new view.
If it’s successful, you should see the view now in the Management Studio when you browse the database.

But does it work in Reporting Services? Let’s give it a try – I’ll setup my shared data source as I would any other SQL Server data source in Reporting Services.
Then, create a shared dataset from it in Report Builder and publish it to the server. If it is working properly, you should be able to preview the dataset in the portal –

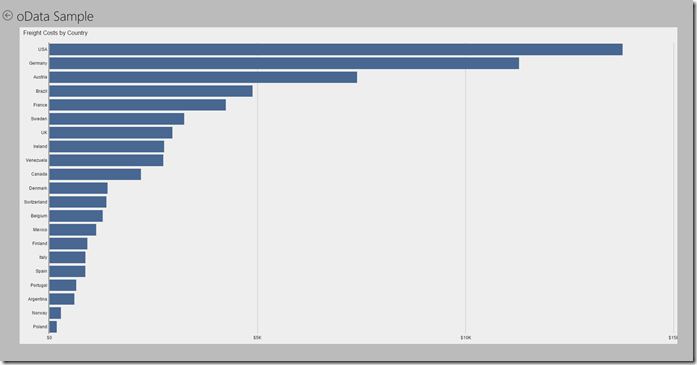
We’ll create a mobile report against the shared dataset. There’s no issues doing this, and it recognizes all the columns properly from the oData source just like it was a SQL Server view.
Finally, I’ll publish the mobile report to the server and try running it in the Reporting Services web portal. Success!
Keep in mind, the data connection could potentially be slow depending on the amount of data you’re accessing.
That’s it – you not only have a way to use an oData feed with Reporting Services now, but you have a way to use dozens of new data sources available from several third party providers.

I’ll be doing a blog post on this provider in SSIS whenever it is available
Now this was a fun blog post to do. Thanks for reading and enjoy your weekend!


Hi Chris,
This question may not be relevant to this article,
Can you set a SSRS 2016 reporting portal and use mobile reporting to pull data off SSAS cubes that reside in sql server 2008 R2 (i.e can i connect 2008 SSAS cube as a datasource with SSRS2016) with the same network/organization.
Thanks! in advance for any insight you may have.
Thanks
Sameer Shetty
Corning Inc.
LikeLike
Yes, that scenario should work just fine Sameer!
LikeLike