It’s finally here – Microsoft SQL Server 2016 CTP 3.2, and with it, the introduction of Mobile Reports and KPI’s into SQL Server Reporting Services. These new capabilities are based on Datazen technology, and are the first step in bringing together the different report types in Reporting Services that was outlined during PASS in October. It’s also the first time I’ll be posting as a member of the Reporting Services team! Yes, I’ve moved over from the Datazen team to work with Riccardo Muti and drive the all-new Reporting Services experience we’re shipping in 2016.
And since the Mobile Report Publisher App just went live, I thought it’d be helpful to do a post where I walk you through the entire process – from how to setup a test/dev server with Reporting Services in Azure, to creating a report and KPI, and finally consuming those KPI’s and Reports in the Power BI app for iOS. So without further ado, let’s get to it!
Setup your server in Azure (this section assumes you already have an Azure account you can use.) –
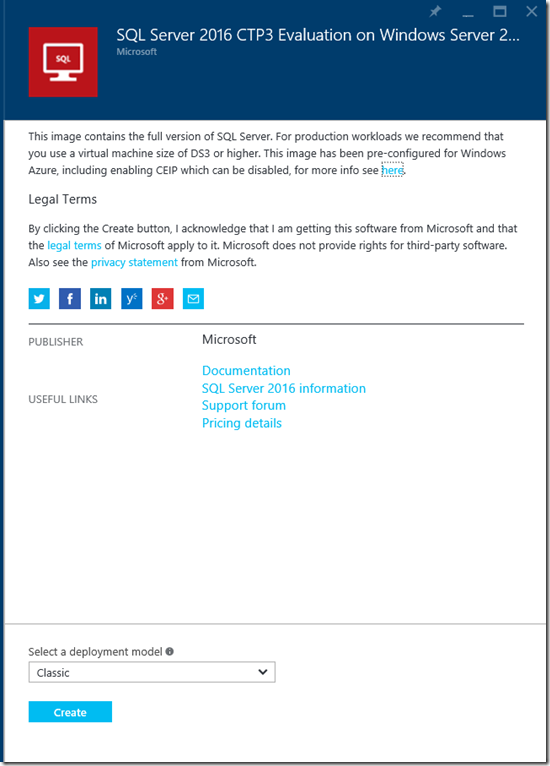
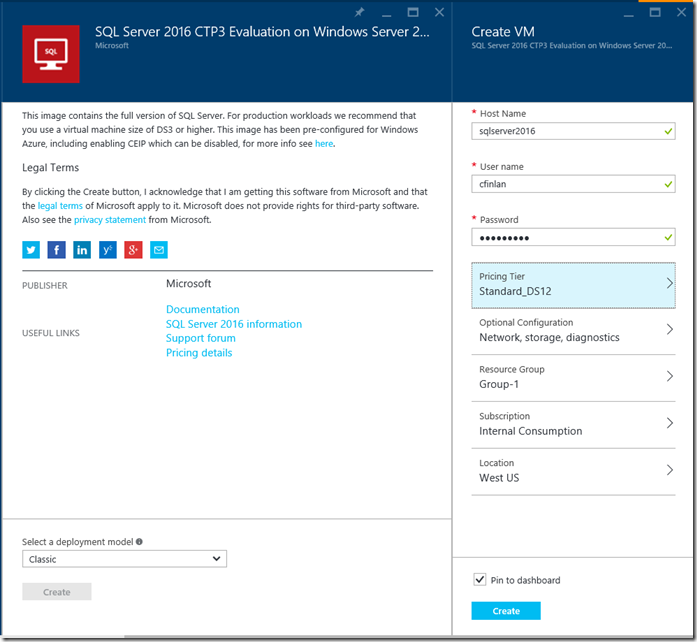
1. The easiest way to get started is to select a VM which has the latest CTP already installed on it. You’ll be taken to the create screen –
I’ll use the “Classic” deploy model for this scenario, since it’s a single VM and I’m only using it for a short period of time. After I hit create, I’ll need to enter my machine details. I’ll leave the defaults for all items (since this is just for testing purposes), save for one –
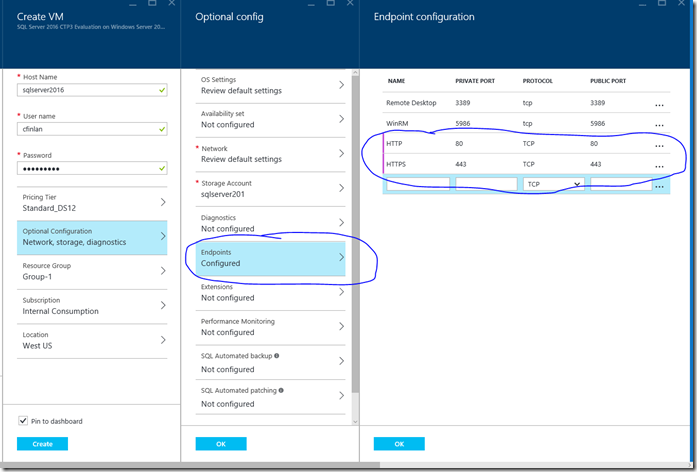
I do want to open up the endpoints on my machine so I can connect to them with my app. So I want to click Optional Configuration –> Endpoints, and I’ll both the endpoints for http and https (I’ll only use http for this walkthrough, but using https instead of http is recommended for security purposes in production scenarios).
Once that’s done, I’ll hit create. My machine should be ready in about 10 minutes or so.
Once it’s done being created, I’ll connect via Remote Desktop by hitting the ‘Connect’ button on my VM dashboard and logging in using the username and password I created in the previous step.
Now that I’m connected, I need to do a couple things on the server to enable Reporting Services and do proper testing.
First, let me turn off IE Enhanced Security Configuration in the Server Manager so I can more easily browse around if necessary in Internet Explorer. This is available under Server Manager –> Local Server
 I can click on “On” and turn off the enhanced security for now. I’d normally re-enable it when I’m finished my session, but I’m deleting the VM when I am finished in this scenario.
NOTE: If for some reason the Azure image is not version 3.2, you can download the latest SQL Server bits after the server has been setup and upgrade SQL Server before walking through this section.
With that complete, I can now setup Reporting Services by running the Reporting Services Configuration Manager. It looks like this in your App Menu on the server.
When I start it, I’ll connect to my default Report Server instance on the box and walk through the configuration steps.
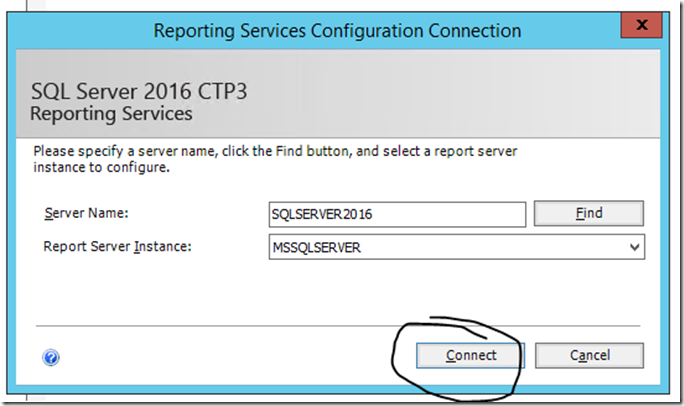
I’ll leave the built-in virtual service account as is and hit next.

For the Web Service URL, I can see that isn’t yet configured. I’ll leave the default information. With that done, I hit ‘Apply’ to apply my selections so I reserve the port and URL on my VM.
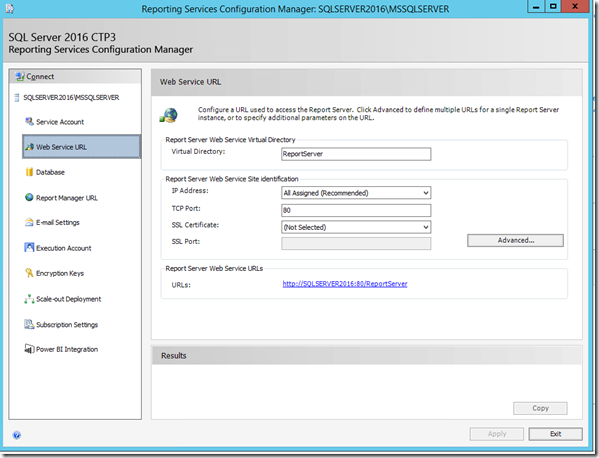
Under Database, I’m going to connect to the local database on the server using my integrated credentials. You can leave the defaults for each option here and hit “Next” until the system completes the database creation process. When I’m done, it should look like the following –
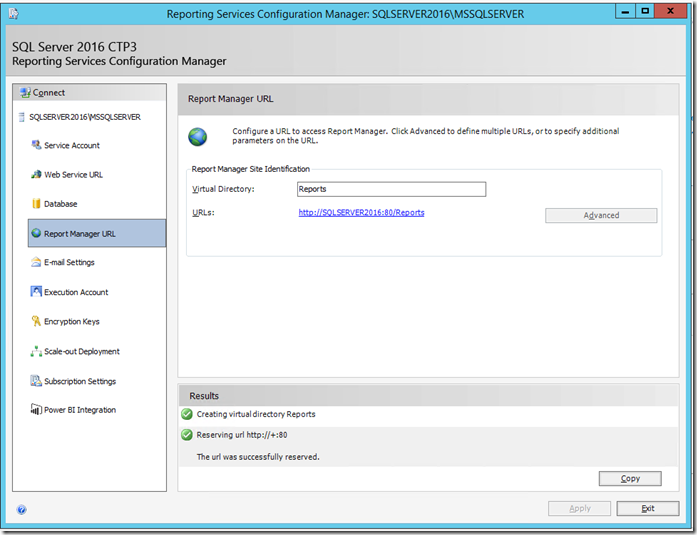
The Report Manager URL needs to be configures as well, I’m also using the default settings here. I’ll hit Apply to save those and reserve the port on the VM for that address. I’ll get a success dialogue if that is done properly or not.
At this point I can hit Exit and start working with my new Reporting Services portal. Please note – my setup was very basic, and really only makes sense when you are doing this for test/dev purposes.
Since I’d like to use the Power BI iOS mobile app to view my reports and KPI’s, I need to enable Basic Authentication on my server. The article I linked to has more details, but the simplest way to set this up is –
1. Open RSReportServer.config in a text editor.
The file is located at <drive>:\Program Files\Microsoft SQL Server\MSRS13.MSSQLSERVER900\Reporting Services\ReportServer.
2. Add the RSWindowsBasic as an option under Authentication Types. It’ll look like something like this –
You can leave the other types listed there (NTLM, Negotiate, etc) and just add the Basic option in the format I show above. Save the file and restart the report server. When you’ve restarted, you can browse to the new report portal under the following location if you’re remotely logged into the server –
http://localhost/reports_preview
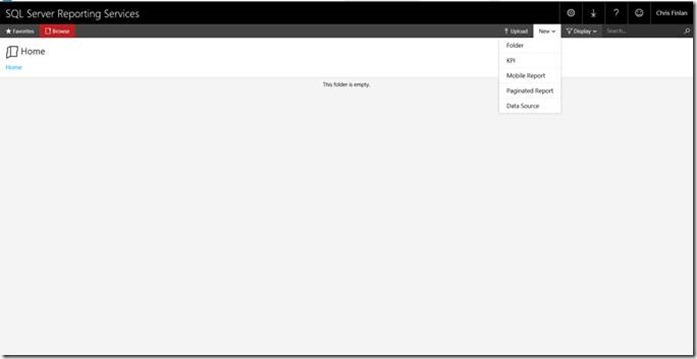
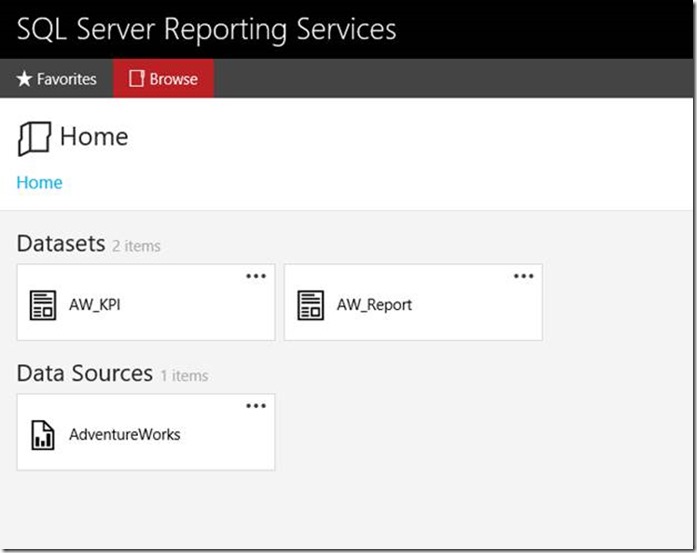
You’ll be taken the new home screen, which should look like this.
Now that we’ve setup our test server, let’s start building! To do so, we need to create a shared data source, where we’ll get our data from.
Create New Data Source
From Portal, select New -> Data Source
You’ll be prompted to go to the old Report Manager screen to enter data connection details.

Click the link in the pop-up window to switch screens and enter your data source information. Please note that currently, you can’t use an Analysis Services data source for your Mobile Reports and KPI’s. I’ll use a SQL Server data source for this example.
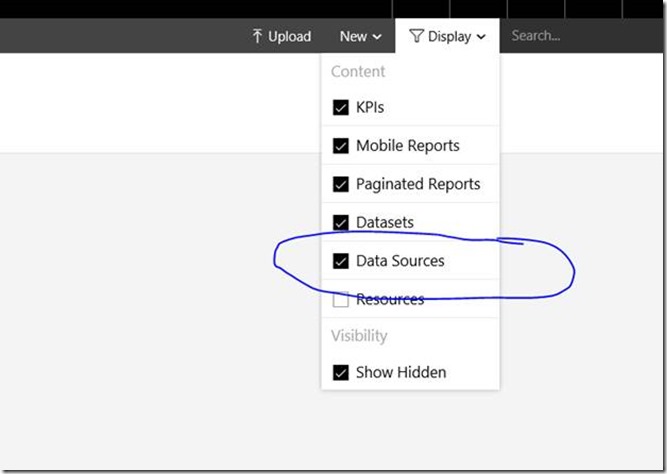
Hit Okay to save the data source. By default, in the new portal, the data source is unchecked from the list of items you see. Enable it by clicking the Display menu and selecting Data Source
You’ll now see the data source available in the new portal.
You’ll need to use an existing Reporting Services client tool to create the shared dataset. This walkthrough assumes you are using the Report Builder client app, available for download here.
Create New Dataset
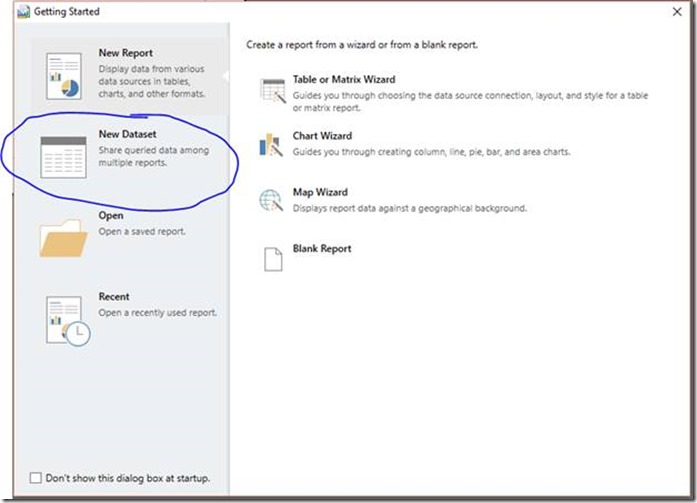
Open Report Builder and choose the New Dataset option from the splash screen
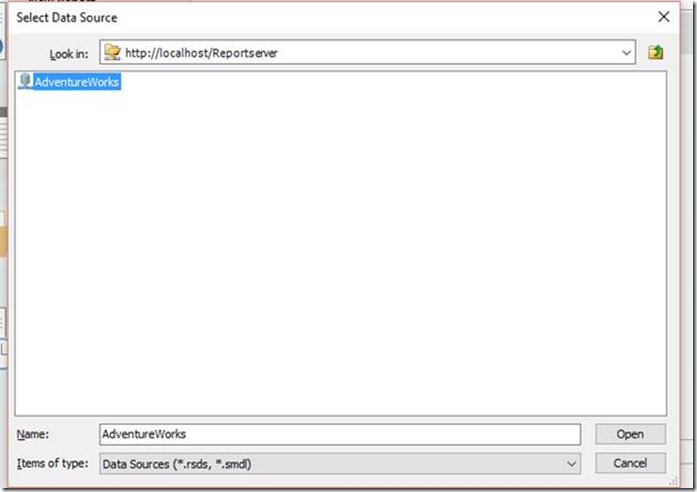
Select the data source that you just created in the previous step. You’ll need to connect to the report server the data source is setup on before proceeding, otherwise it won’t appear as an option for you. You do that by hitting “Browse other data sources”
Typing the name of the server in that hosts your data source in the Name field in the following format –
After you hit Open, you’ll then be able to navigate to the data source you setup in the previous step.
Select it and hit Open. Then, create your dataset using Report Builder.
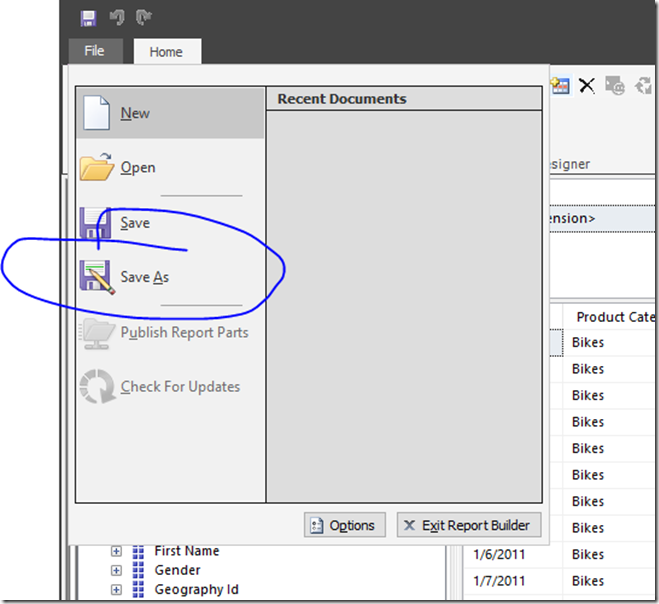
When complete, save the data source to the SSRS server.
You’ll then be able to use the data set for your KPI and/or Mobile Report. You can create multiple data sets against the same data source, and they can be re-used by different KPI’s and Mobile Reports without rebuilding it each time.
Now you can create KPI’s and Mobile Reports against these shared datasets.
Create New KPI
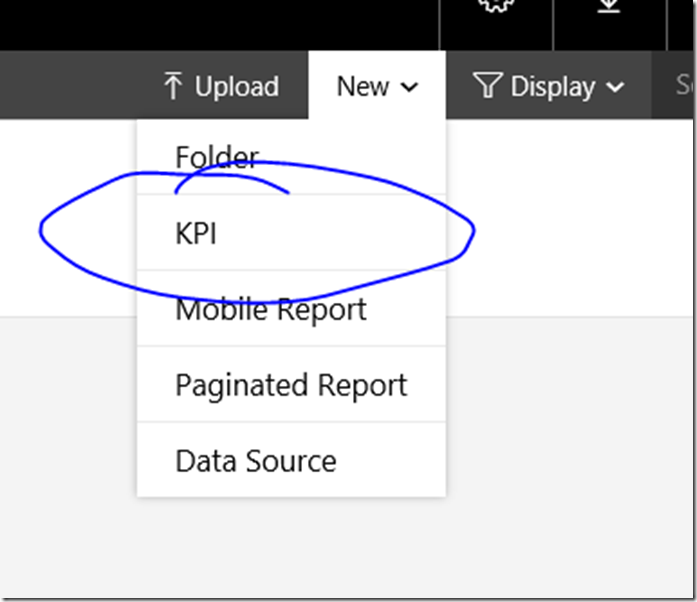
KPI’s can be created right from the server. Select “New KPI” from the dropdown menu –
You’ll be taken to the KPI creation screen. You have the option to manually enter values, or to use a shared dataset. Let’s change the “Value” entry from the default to one from my dataset. I click on the dropdown to change the Value from “Set manually” to “Dataset field”
Clicking on the ellipsis will bring up a window where I can select my dataset from
Then I can choose the value from the result in my dataset.
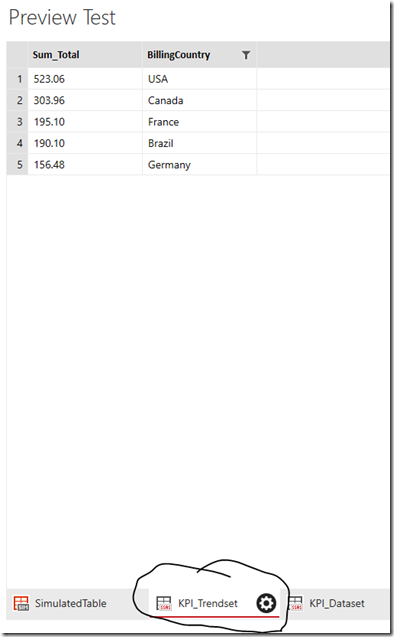
Please note – for the value, goal and status fields, I can only choose the result returned in the first row of my results. For the trend set, however, I can choose which column accurately reflects the values that reflect the trend set.
Then I hit “Create”, and my KPI will appear on my report portal!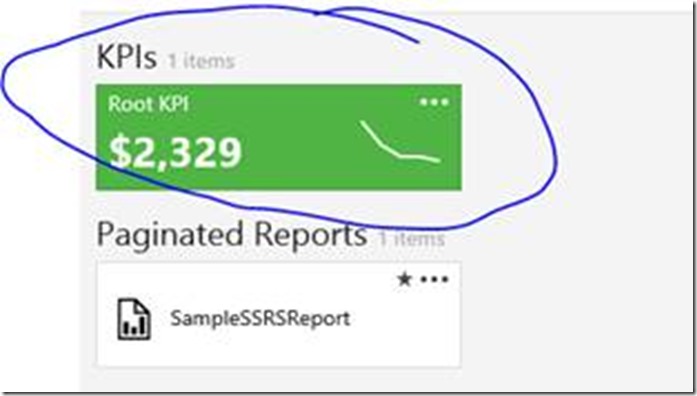
Create New Mobile Report
To create a mobile report, you would download the new mobile report publisher. When you first open the tool, you’ll see a blank canvas where you can create your report where you either start with your visuals OR with your data. The experience is the same as you have with Datazen today in that respect.
If you start with your visuals first, sample data will be generated automatically that is tied to the report and will change dynamically as you change your visual selections.
You can see this by switching to the data tab.
To add your own data, click the “Add Data” button and select where your data is located. You can add local Excel data OR a shared dataset from your SSRS instance.
You can then change the data that your visuals are connected to
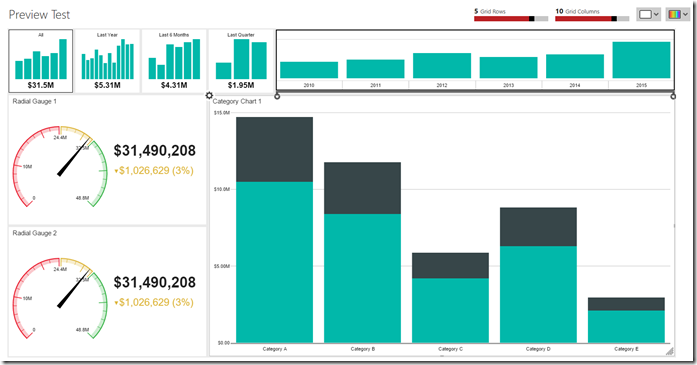
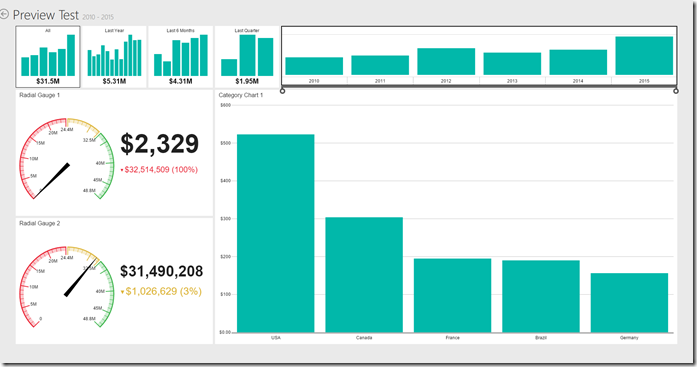
I can then return to the canvas and see the data has been hooked in to my visuals when I test the report.
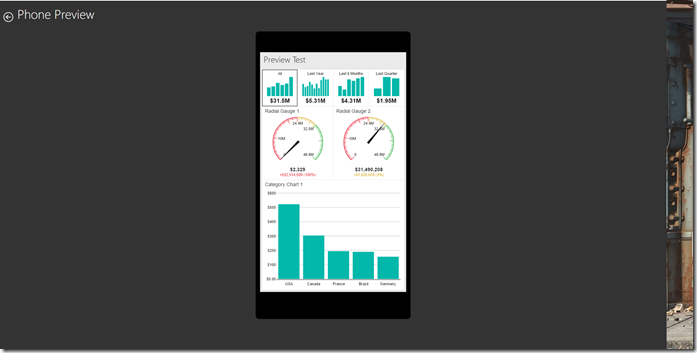
In addition to the main layout, I need to create a phone layout for my phone users so the experience is optimized for that device type and proper thumbnails can be generated. I can do so by changing the layout dropdown in the upper-right hand corner to Phone and laying out my report. If I don’t remember to do this, the app will prompt me to do so.
I can also change my theme options just like I could in Datazen, by choosing one from the the upper right-hand menu. I’ll leave mine as the default theme for this report, however.
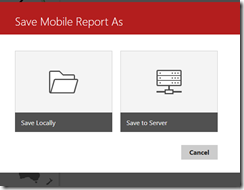
Once finished, I can save my report either locally, or to an instance of Reporting Services. To do so, I can hit the save button in the upper right hand corner
And then choose where I’d save my report to.
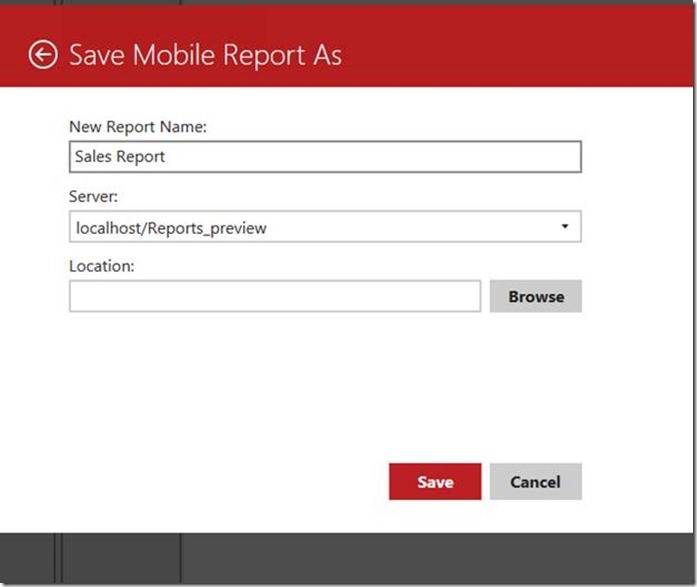
If I choose server, I’ll be prompted to save my report to a folder location on the server I got my data from.
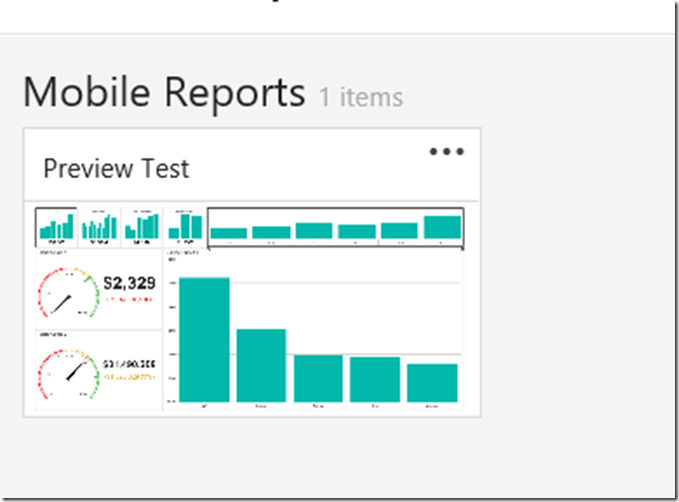
After I’ve saved it, if I return to the portal, I can open the report and see my mobile report thumbnail.
And click it to open and interact with the report in my browser.
View KPI’s and Mobile Reports in the iOS App
The Power BI app now allows you to connect to your Reporting Services server to view your Mobile Reports and KPI’s. To get started, make sure you have the latest version of the Power BI app downloaded to your device.
Once downloaded, when you first open the app, you’ll be greeted with a welcome slide.
Hit the Sign In button to move to the app experience.
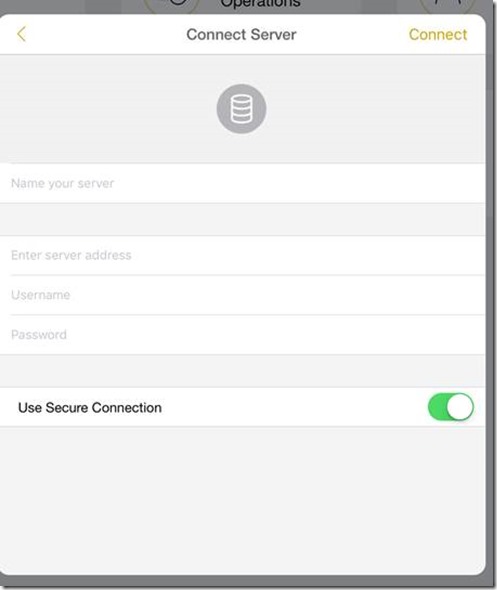
This is where you’ll add your Reporting Services server. To do so, select the Reporting Services button and enter your server details and the credentials you’ll use to access the server. You can also toggle whether the connection is using http or https. Again, https is recommended for all production scenarios.
Enter your information accordingly. You’ll need to make sure the URL follows the pattern I demonstrate below.
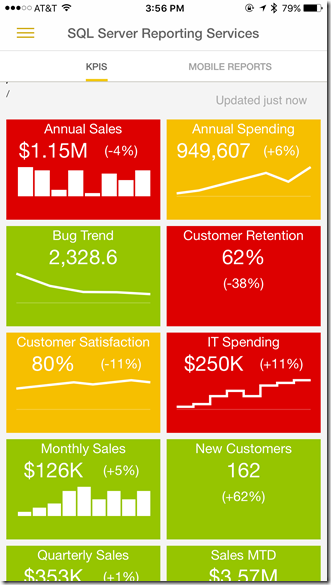
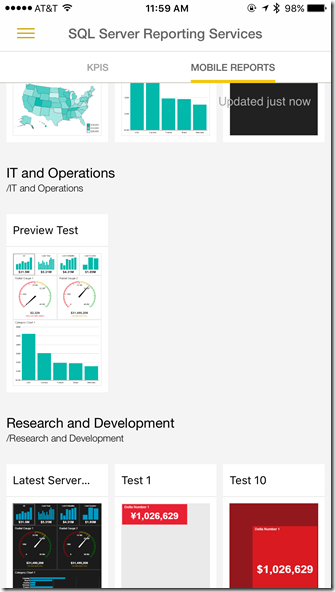
Click Connect. If it connects successfully, it will show the KPI and Mobile Reports screens you have access to on the server. You can swipe between the two options to view the different assets accordingly.
You may tap on any KPI or Mobile Report to bring it to full screen and interact with it accordingly.
When you enter the app in the future, you will see the server in the menu that you have setup. You can only have a single connection to Reporting Services at a time in the app.
The app will default to the KPI page as the first page you see in the future unless you are also connected to a Power BI instance. It will default to Power BI when both services are connected.
Whew! That was a long post, but hopefully it’ll help you get up and running quickly so you can try it this new functionality over the holidays. So Happy Holidays, and enjoy the all-new SQL Server Reporting Services Mobile Reports experience!




















GREAT job – thanks for posting this.
LikeLike
Thanks, great post, but when i try download de new mobile reports I recieve a message that te team was working to delivery the APP. This in a on-premisses lab envoirement. I just can create KPIs.
LikeLike
Hi there, the link is definitely working. Can you try here – https://www.microsoft.com/en-ca/download/details.aspx?id=50400
LikeLike
Thanks Christopher, before I read the post, I did the download… 🙂
LikeLike
Hey Christopher,
Sorry to be that guy, but per the note
“Please note that currently, you can’t use an Analysis Services data source for your Mobile Reports and KPI’s.”
Will this available in an upcoming CTP or is this a longer-term sort of issue?
Thanks for all the awesome job of documenting the undocumented! Very excited about SSRS 2016.
LikeLike
We’re looking to have this in one of the upcoming previews, yes.
LikeLike
Thanks, This is a great post.
LikeLike