Whew – this is my fourth (and final!) blogpost in four days around the Technical Preview for SQL Server Reporting Services. It’s been a lot of work, but also a lot of fun putting these together. For my final post, I wanted to touch on ten items you’ll see (and can try) in the preview to ensure you don’t miss them.
Before I do that, however, I wanted to take a moment to say “Thank you”. This past week at PASS Summit 2016, and the reaction from the community to this entire preview, has been one of the highlights of my entire career. I got to meet several of you for the first time at PASS, and as you learned very quickly, I’m not someone to sugarcoat things. You all embraced this very unique preview and made the engineers who were on-site at PASS from the Reporting Services team feel like the rock stars they are. That type of passion and energy is so infectious, again, I can’t thank you enough for letting the team know how excited you were with what we’ve delivered to date. Our customers are the reason we fought so hard to bring this to you, and I promise, this is the just the first step. We’re already back at it, working hard to bring you the first installable preview of this functionality as quickly as possible.
1. You can access your VM in Azure through a web browser
If you’d like other users to view and interact with the technical preview without remoting into the VM. This is helpful if you’d like to show it to additional people in your organization, give users read-only access, etc. Keep in mind, you’ll still need to do all creating/editing of Power BI Desktop reports on the VM directly using Remote Desktop.
To try this out, find the public IP address of the VM in Azure listed in the essentials section

Open a web browser on your local machine and type in the address/reports in the following format – http://8.8.8.8/reports (enabling https for the VM is something that is a little tricky to do, so I’ll have to decide whether that’s worth doing a future post around or not). Enter your username and password for the VM, and you’ll be granted access to the report portal.

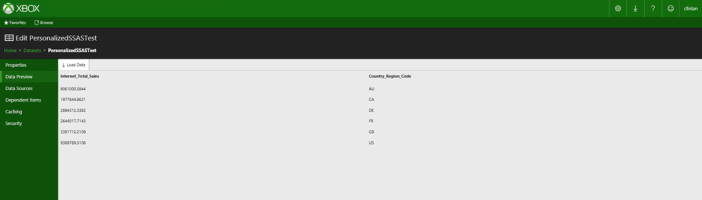
2. You can use embed the Power BI Reports just like mobile and paginated reports.
If you’d like to see your Power BI Report in an iFrame, you can add ?rs:Embed=true at the end of the report url. For example, here is the embed url for the Sample Sales Report when connected directly to the VM via remote desktop – http://localhost/reports/powerbi/Sample%20Sales%20Report?rs:embed=true

3. Mobile Reports and Power BI Reports both are available in the execution logs.
This is a common request for those folks interested in seeing when people ran certain reports and how often they did so. If you go into the ReportServer database catalog via SQL Server Management Studio and run a query using the ExecutionLog3 SQL view, you’ll see log entries for both of these report types now show up –
![]()
4. Direct url navigation is now available for KPI’s.

Users have so liked the new reporting services interface, they’d asked for an easy way to link to other content directly from the portal homepage so everyone can use the new portal as a starting point in their organization. With this in mind, we added an additional option to KPI’s called “Direct Navigation”. This allows you add a custom url as related content, just like you can in the portal currently, and simply bypass the current KPI pop-up action you get when you click on the KPI and go directly to the linked content.
For any KPI’s that you use this feature with, you’ll a little “link” in the upper right-hand corner of it so you can tell that it is enabled. This will give the ability to create “dummy” KPI’s that you use just to link to outside content.

5. You can turn report comments off for certain users by creating a custom role in SQL Server Management Studio and assigning it to them for folders/reports.

One piece of customer feedback we got when considering the comment feature was the need to give report owners the ability to restrict certain users from adding or viewing comments. To accomplish that, we added new tasks for comments in Reporting Services that are assigned to security roles. Security Roles in Reporting Services are managed through SQL Server Management Studio. You can create a new role without these permissions and assign them to users accordingly by following the steps in this article. (We’d recommend you hold off on changing the security roles for the Power BI reports in the Technical Preview, since we’re aware of an issue that was reported on another blog.)
6. You can favorite Power BI Reports just like any other report type

7. You can install another instance of Analysis Services on the same machine to have both Multidimensional and Tabular running simultaneously.

During setup, you get the option to run the VM with either Tabular or Multidimensional mode already running (along with demo Power BI content tailored for it). However, if you really want to have both modes available on your machine, the developer edition installation files used for both the database engine and Analysis Services are located here on the VM – C:\SQLServer_13.0_Full
Simply add a new stand-alone instance of Analysis Services on the same machine and you’ll have both options available to build reports against.
8. You now have the option for a “List” view of your items in the portal

Simply toggle the layout option in the View menu in the portal to switch view types.
9. A new, expanded context menu is available when you click the ‘…’ option for that item.

You’ll hear much more about items 8&9 in a future blog post on the Reporting Services team blog.
10. The Technical Preview VM will expire in six months.
Also note, the expiration date is six months from the date it was first made available in the portal. Just be aware of this, and keep in mind you’ll probably want to migrate any content you put on there prior to this date.
And we’re done – finally, I can take a few hours to relax and watch the big Eagles/Cowboys game this evening. I’m in such a good mood, I might not even care if the Eagles lose to Dallas.
Yeah, no, I’ll care – Go Birds!
Embed from Getty Images